Easy Print Contents of Div Using Javascript
I have previously shared an article here explaining how to print HTML table with images using JavaScript. Now, here in this article I'll show you how to print the contents of a DIV element with images using plain old JavaScript.
An HTML <div> element can have different types of content inside different elements, like a <p> element, a header element like <h2>, it can have an <img /> element etc.
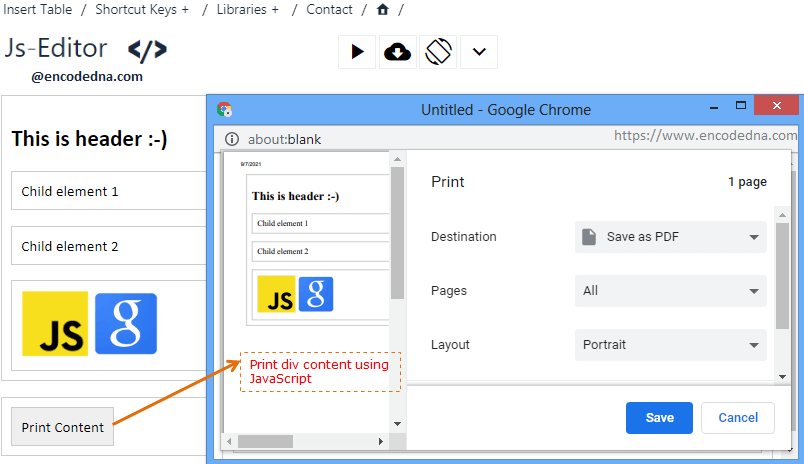
image

To print the contents of various (child) elements inside a <div> or any parent element, we'll have to first extract the contents and store it in a variable. Then we'll open a window (a pop window) and write the contents (stored in a variable) in the window and print.
Let's see an example.
In the first example, the <div> will have two <p> elements and an <h2> (for header) element.
<!DOCTYPE html> <html> <head> <style> div { border: solid 1px #CCC; padding: 10px; } </style> </head> <body> <div id='parent'> <h2>This is header :-)</h2> <p> Child element 1 </p> <p> Child element 2 </p> </div> <p> <input type='button' value='Print Content' onclick='myApp.printDiv()' /> </p> </body> <script> var myApp = new function () { this.printDiv = function () { var div = document.getElementById('parent'); var win = window.open('', '', 'height=700,width=700'); win.document.write(div.outerHTML); win.document.close(); win.print(); } } </script> </html> The parent <div> element has an id. Using the element's id, I am first extracting the contents of it and storing it in a variable. See the above script.
The window object is important here. It represents a window in browser. I am using the object to open a new browser window.
window.open()
The method takes 4 parameters like url, name, features and replace. However, I have just assigned one value that is the height and width of the window. If you remove the first two blank parameters, the method will open a new window in new a tab.
The .write() method (win.document.write(div.outerHTML);) will write the contents in the new popup window, which is later closed using the .close() method.
After closing the window object, I am printing the contents using the .print() method.
win.print();
Note: If a printer is attached to the computer, it will ask you to choose a printer. Or else, it will print a PDF document.
Print <div> Content with Images
Now, lets print the contents of a <div> element along with images.
<!DOCTYPE html> <html> <head> <style> div { border: solid 1px #CCC; padding: 10px; } img { width: 75px; height: 75px; } input { font-size: 20px; } </style> </head> <body> <div id='parent'> <h2>This is header :-)</h2> <p> Child element 1 </p> <p> Child element 2 </p> <div> <img src='https://www.encodedna.com/images/theme/javascript.png' alt='JS' /> <img src='https://www.encodedna.com/images/theme/google.png' alt='Google' /> </div> </div> <p> <input type='button' value='Print Content' onclick='myApp.printDiv()' /> </p> </body> <script> var myApp = new function () { this.printDiv = function () { var div = document.getElementById('parent'); var win = window.open('', '', 'height=700,width=700'); win.document.write(div.outerHTML); win.document.close(); win.print(); } } </script> </html> There is not much difference between the first and second example. The script is the same for both the examples, with or without images. There's not much to explain.
However, I have defined CSS style in the above example (the 2nd example) for the elements inside the <head> tag, especially the images (img { width: 75px; height: 75px; } ). The images have specific width and height defined. See the <style> tag inside the <head> tag. But, the styles were not applied when I tried to print it.
We can apply style to the images and other elements before printing it.
Add some Style to the Print
To define style to the print, add a variable and add few styles (CSS styles) according to you requirement. For example,
<script> var myApp = new function () { this.printDiv = function () { var div = document.getElementById('parent'); var win = window.open('', '', 'height=700,width=700'); var style = '<style>'; style = style + 'div, p {border: solid 1px #CCC;' + 'padding: 10px;}'; style = style + 'img { width: 75px; height: 75px;}'; style = style + '</style>'; win.document.write(style); win.document.write(div.outerHTML); win.print(); } } </script> Now, the <div> element has borders and padding. The image has specific width and height. Similarly, if you want you can define fonts, size, colours etc.
Thanks for reading ☺.
← Previous Next →
Source: https://www.encodedna.com/javascript/print-div-content-with-image-using-javascript.htm
0 Response to "Easy Print Contents of Div Using Javascript"
Post a Comment